Showing posts with label Meat. Show all posts

Wednesday, May 24, 2017

Zoodles in a White Wine Cream Sauce (with Steak, Salmon, Chicken etc)

I need some new TV show recommendations. Anyone? All of ours (and there are A LOT), are either off season or we flew through them on amazon/netflix/HBO. Some of my recommendations: Bloodline, Stranger Things, Nashville, Homeland (duh), Big Little Lies (double duh), and the MISSING - creepiest most addicting show I've seen in a long time. Typing all those shows out, you're probably thinking that I'm a couch potato and maybe I should pick up a book. And quite frankly, it turns out I do have some couch potato in me and I love TV. Plus we've been subbing pasta for zoodles so I can lay around all I want.

I'm going to spare you the zoodle talk, because everyone who's had them knows how amazing they are. Amazing and sneaky. There aren't many substitutions in this world that are truly maybe for the better. But this one is. They really soak up the sauce so much more than regular pasta, and you can pair them with a semi-indulgent cream sauce like this one because you're saving yourself 400 calories. Sorry, guess I'm not sparing you the zoodle talk. I can't help myself! Love these things.

Recipe (for 4-5)
  • ~1.5 lb zoodles (I used two of the 10.7oz noodle co. containers)
  • 1 bunch asparagus
  • 1 container sliced mushrooms (the normal size..think it's 8 oz?)
  • 2 tablespoons butter
  • 2 tablespoons flour or corn starch
  • 1 clove garlic (I used 1/2 teaspoon of the jarred minced garlic)
  • 1/2 cup white wine
  • 1.5 cups half & half
  • 1/4 cup milk
  • 1 teaspoon kosher salt
  • 1/2 cup finely shredded Parmesan cheese 
  • 3-4 cooked/grilled steaks, chicken breasts, or salmon fillets
I started by getting the veggies ready first; I simply cut the asparagus into 1-inch pieces, then steamed them in a bit of water in the microwave for 4 minutes. I put them in an ice bath immediately after to conserve the bright green color. I dry-sauteed the mushrooms in a sauce pan for about 8 minutes to cook through and remove excess moisture.

Next, I made the sauce. Create a roux by melting the butter over low heat; add the garlic to cook. Stir in the flour with a fork, then add in the white wine. Cook for a minute or two over low heat, careful not to burn.  Slowly add in the half & half and milk, and whisk to combine (it can be lumpy at first - keep whisking). Add salt.  Stir and cook over low heat to thicken; add in the parmesan cheese. Stir in the zoodles and veggies (about 2-3 cups) and cook for 2-3 minutes until the zoodles are cooked but crisp.

We grilled steaks seasoned with plenty of salt (About a teaspoon per steak) and pepper.  Grills vary but our New York Strips cook in about 8 minutes,  flipping halfway through. Would be great with chicken or salmon on top!

Thursday, March 9, 2017

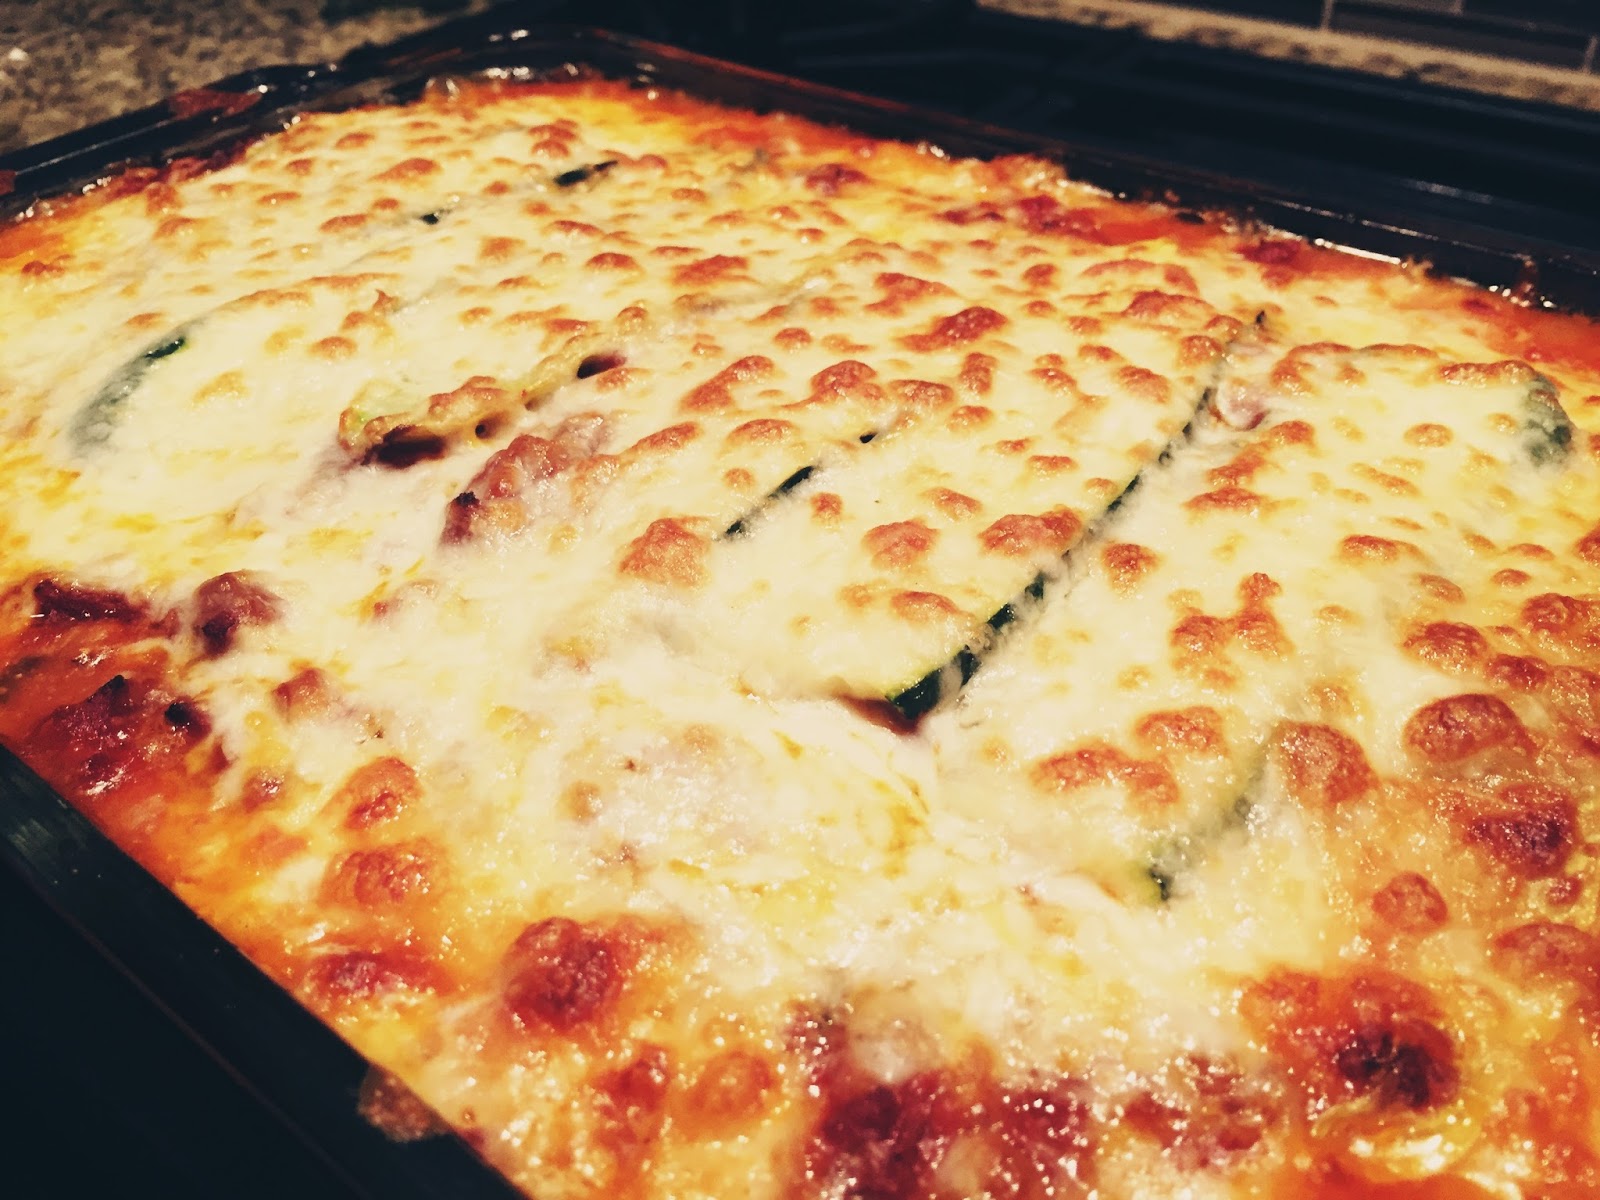
Lasagna with Zucchini & Yellow Squash

You guys, this is one my favorite things I've made in a long time. I only tell you that because when I'm searching the internet for inspiration on what to cook, I get lost in the 603 million recipes there are out there. Probably more. Sometimes I just want someone to say: cook Suzy's hot beef for dinner. It would simplify everything and there wouldn't be so much wasted time on the net playing culinary mind games

So I'm telling you, try this! It won't disappoint. The inspiration behind this recipe is that we love Italian food, but sometimes aren't in the mood for tons of pasta. Also my husband can be a bit of a broken record sometimes, and every time we eat spaghetti squash, he says "I don't even miss the pasta. If I was at Terrilli's enjoying a glass of wine with this I wouldn't even know the difference." (Terilli's is our favorite local Italian joint). 

So, I wanted lasagna...but wondered if we could try a version without the noodles (i.e. without the carbs, without the gluten. I had to redeem myself after eating these all week. Though I did eat one after for dessert).  I also wanted it to be relatively healthy so used part-skim mozzarella, low fat cottage cheese, and 96% lean ground beef.  You guys, I thought this recipe was enough for like 24 people and we literally ate 1/3 of it in one night. So, I don't know whether to tell you this serves 12 or serves 6. Totally depends on your noodle-less lasagna capacity.

Recipe

Meat Sauce
  • 1 lb 96% lean ground beef
  • ~1/3 lb reduced-fat Jimmy Dean sausage
  • 3/4 cup diced white/yellow onion
  • 1/2 teaspoon minced garlic (jar), or 1 clove garlic
  • 1 small can tomato pasted
  • 1 can crushed tomatoes (14.5 oz)
  • 1 can diced tomatoes, drained (14.5 oz)
  • 1 teaspoon salt
  • 1/2 teaspoon pepper
  • 1/4 teaspoon oregano
  • 2-3 tablespoons fresh chopped basil 
Cottage Cheese Layer
  • 2 cups lowfat cottage cheese (not nonfat)
  • 6  tablespoons grated Parmesan cheese (from the cheese section rather than Kraft)
  • 1 egg
  • S&P
Other Layers
  • About 4-5 medium summer squash - zucchini and yellow squash
  • Salt
  • 4 cups part-skim mozzarella
  • ~1/4 cup grated parmesan
Start by making the meat layer.  Brown the beef and sausage over medium heat. While cooking, add the diced onion and garlic. Stir and cook until meat is no longer pink.  You shouldn't have much fat here so no need to drain, but if you used fattier beef or more sausage - drain the fat. Stir in the tomato paste, canned tomatoes, and remaining ingredients.  Simmer on low for about 25 minutes. Sauce should be thick and meaty, not watery. 

Meanwhile, we need to get the excess moisture out of the squash so the lasagna isn't soggy. This is the most time consuming part of this recipe. First, slice them lengthwise as thin as you can. This would be easier with a mandoline, but I don't have one so just used a sharp knife and played chicken with my fingers. About 1/8 in thick. But like I said, just as thin as you can.  Lay them out on paper towel, and salt them very generously.  The salt will draw out some of the moisture. Let sit for 15 minutes, then pat them dry.  Next, place the squash into a bowl and microwave for 2 minutes. This will bring out more moisture. Drain the bowl, lay out the squash again and pat them dry. Set aside until ready to use.

In another bowl, mix the cottage cheese, Parmesan, egg, and season with salt & pepper.

Preheat the oven to 375 if ready to cook. I assembled my lasagna and then refrigerated for an hour until I cooked, but either is fine. I was busy putting two tiny humans to bed so wanted to eat later - no advantage to waiting.

Get out a 9x12 inch dish and start to layer:
1st layer: 1/3 of the meat sauce, then 1/3 of the squash (this doesn't need to be perfect, just lay them side by side, covering most of the dish), then spread 1 cup of the cottage cheese, then ~1.5 cups of mozzarella
2nd layer: 1/3 of the meat sauce, 1/3 of the squash, rest of the cottage cheese, ~1.5 cups mozzarella
3rd layer: Rest of the meat sauce, rest of the squash, and the 1/4 cup parmesan. Season with salt and pepper.

Reserve remaining mozzarella (about 1 cup).
My last layer of squash doesn't totally cover the top, but that's ok!

Cover the lasagna with foil and bake for 40 min.  

Remove foil and bake for 15 more min to remove any excess moisture.  

Then top with remaining cheese (1 cup mozzarella) and broil for 3-5 minutes

Take out of the oven, and this step is important - let sit for at least 20 minutes before slicing. This will ensure the lasagna stays in tact and you can cut nice clean pieces.
And guess what guys? Even sitting at home, eating this without a glass of wine, we didn't miss the noodles.

Thursday, March 2, 2017

Beef & Broccoli Stir Fry


I love a good weeknight stir fry. And while this chicken stir fry has been my go-to for a long time, I've been craving beef lately. And something a tad more interesting and a little more indulgent feeling. This stir fry turned out exactly how I wanted it to- the perfect savory flavor combination in a delicious rich but healthy sauce. We loved it and will be making it LOTS. Step aside, chicken. Also if you have any suggestions for storing your wok in a normal sized kitchen cabinet, please let me know. I feel like they don't need to be quite so big and awkward.

Recipe
  • 1 lb top sirloin
  • 3-4 cups chopped broccoli 
  • 3 cups chopped carrots (1-inch pieces)
  • 1/2 cup diced white onion
  • Olive oil
Marinade
  • 3 tablespoons soy sauce
  • 2 tablespoons corn starch
  • 1 tablespoon rice vinegar
  • 1 tablespoon sesame oil
 Sauce
  • 3/4 cup water
  • 1/2 cup low sodium soy sauce
  • 1 tablespoon rice vinegar
  • 1 tablespoon sugar
  • 1 tablespoon corn starch
  • 1/4 tsp ground ginger (or fresh would be better, if you have it!)
  • 1/4 tsp minced garlic (jar) or 1 clove garlic

Slice the sirloin into thin 1-inch strips. Combine the marinade ingredients and marinate for at least 30 minutes (but no longer than 24 hours). In a large saucepan or wok, add about 1/2 cup water and some olive oil. Add the veggies, stir around and then cover and steam for about 8-10 minutes until soft but not mushy. Transfer the veggies to a bowl. Pour out any remaining water if necessary, add another tablespoon of oil to the wok, then add the meat. Cook until no longer pink, stirring to get all sides, about 8-10 minutes. 

Mix all the sauce ingredients. Add the sauce to the meat, stirring to coat over medium heat. Allow to thicken, then add back in the veggies. Mix everything to evenly distribute the sauce and meld all the flavors. Serve over rice or noodles. Then begin the annoying process of figuring out where to put your giant wok this time.

Thursday, January 26, 2017

The Most Delicious Braised Short Ribs


**This is a terrible picture. I'm sorry, but it was New Years and I was more into the champagne.


Guys, make these. For a dinner party would be my rec, because you do most of the work the day before and they are flat out succulent. And flavorful and rich. And go ridiculously well with things like Mac 'n Cheese.

Recipe
  • 10-12 beef short ribs - I always ask for the least fatty ones
  • ~2 cups mirepoix (mix of finely chopped onion, carrot, and celery) 
  • S&P
  • 1 bottle good red wine
  • ~ 6 cups beef broth
  • Worcestershire
  • Bay leaf
  • Thyme
Preheat the oven to 350.  Heat some olive oil over medium in a big dutch oven. Working in batches, brown the short ribs on all sides. Generously season with salt & pepper while cooking.  Transfer to a plate.  Pour out the excess fat, then add in the veggies, cooking for about 5-10 minutes until soft (add more oil if necessary). Transfer veggies to a bowl. Deglaze the pan with the bottle of wine.  The wine flavor really does stand out in the end, so use a bottle that you would enjoy drinking.  Turn the heat up to high and let wine reduce by 3/4 - about 20 minutes. Add the meat back into the pan, then pour in enough beef broth to almost cover. Sprinkle in a bit of worcestershire, a bay leaf, and some fresh or dried thyme. If using low sodium beef broth, you'll need to add more salt. Don't under salt! That's the fastest way to a flavorless dinner, IMO.  Bring the liquid to a boil, then cover and put in the oven for about 2.5 hours, until the meat is fork tender. Remove from the oven, let the ribs cool in the liquid, and then refrigerate (in the covered pan) overnight.

The next day, a couple hours before you want to serve dinner, take the ribs out of the fridge. And here is the magical/super gross part of this recipe. ALL of the fat will have solidified on the top - and it is A LOT - making it very easy for you to take a spoon and scoop it all out. It is a very gross yet very satisfying process. I've made short ribs before without this refrigeration/fat removal step, and have been disappointed with the fattiness of the end result. This cuts out that problem completely, allowing you to really enjoy the flavor of the meat and sauce.  Ok, so remove all the fat, then place the pan back on the stove and bring sauce to a boil. Let sauce thicken up and reduce by a lot (about 3/4), until sort of thick and glaze-like, a little over an hour. Continue to spoon sauce over the meat as it reduces down. Serve these delicious guys over something equally delectable, like creamy mashed potatoes or mac 'n cheese!

Sunday, November 1, 2015

Beef Stew in a Pumpkin

Do you like how I always post holiday recipes after the relevant holiday? A truly savvy blogger would post the recipes PRIOR to the holiday to ensure all of their readers could put them to use.  You won't be able to make beef stew in a pumpkin for a whole year now, and by then you'll forget about it. Sorry. I simply don't have the time or forethought to do it ahead of time.

This is actually easier than I was anticipating. The hardest part BY FAR was carrying the pumpkin to the register and then out to my car. And for some reason I had a very strong urge to smash my own pumpkin. I didn't, but I kept thinking in my head how fun it would be to hold it over my head and just throw it down as hard as I could.

As for the stew recipe, it is kind of beef bourguignon meets beef stew. I didn't take exact measurements, but that's the beauty of stew - you can follow a very loose recipe and it's sure to turn out delicious.

Recipe
  • 1 very large pumpkin
  • 2 lb stew meat, chopped into 2-inch pieces
  • 1/4 cup olive oil
  • 2-3 teaspoons salt
  • 1 onion
  • Minced garlic
  • 3/4 can tomato paste (6 oz can)
  • 1/2 bottle Guiness
  • 1/2 bottle red wine
  • 3-4 cups beef broth
  • 1 tablespoon Worcestershire
  • 1 tablespoon sugar
  • 1/2 teaspoon ground Oregano
  • Dash paprika
  • 1 bay leaf
  • 3-4 tablespoons corn starch, whisked with 1/2 cup water
  • 1 teaspoon pepper
  • Carrots (probably about 3 cups, chopped into 1-inch pieces)
  • Turnips, chopped (3)
  • Mushrooms, halved (1 container)

Preheat the oven to 375.  First get the stew going, then you will put the pumpkin in the oven to pre-bake.

Heat the olive oil in a large dutch oven over medium heat.  Generously salt the meat, then add to the pan and brown on all sides. Transfer to a plate.  Add the onion and garlic, and cook through - adding more olive oil if necessary.  Stir in the tomato paste and a pinch more salt. Pour in the beer and wine, and simmer until slightly reduced - about 10 minutes.  Add the meat back into the pan, along with enough broth to almost cover the meat, the Worcestershire, sugar, Oregano, paprika, bay leaf and pepper.  Bring to a simmer, then stir in the corn starch mixture to thicken the gravy.  Simmer on low-medium for 1.5 hours. While that cooks, you can prepare the pumpkin and rest of the vegetables.

Cut the top off the pumpkin, and scrape out and discard all the seeds and excess flesh.  Brush the pumpkin with a couple tablespoons of melted butter (inside and out), then place on a baking sheet and into the oven for 40 minutes (with lid on).

After the stew has cooked on low for 1.5 hours, add in the vegetables.  If there is excess fat on the surface you can scrape it off, and add more beef broth (or water) if you need more liquid.  Cook for 15 minutes, then transfer the stew to the pumpkin (place lid back on), and put it all in the oven for another 15-20 minutes or so. Take out of the oven and let cool for a few minutes before serving (with lots of crusty bread for the gravy).  

While I was carrying this to the table I thought how even more fun it would be to smash my own pumpkin now with 76 pounds of beef stew in it.  I'm glad I didn't though because it was delicious and we gave much of the leftovers to a very happy neighbor.

Friday, August 21, 2015

Ground Beef Tacos

I’ve already posted about ground beef tacos, and interestingly enough I pointed out that most people don’t need a taco recipe. Those spice packets are very delicious, easy, and practical.


And yet, here I am, posting another ground beef taco recipe. Why? Because:

1.     I forgot I already posted about ground beef tacos
2.     I love ground beef tacos and we ate them on Sunday (Mon, Tues, Wed…)
3.     We liked these better
4.     I am making a conscious effort to eat more tacos


As a Wisconsinite, I grew up with very delicious simple comfort food (and cheese).  My mom was an excellent cook and we were always excited about what she was making for dinner each night.  I used to love her ground beef taco recipe, and I would pile my tortilla high with ground beef and rice. Once a carb lover, always a carb lover.

But after moving to Texas, unfortunately your tongue gets used to a certain level of spice. I still would not call myself a real heat-lover, but in general my husband and I like our Mexican food with a decent amount of kick.  And, that’s just what these tacos are. A Wisconsin-meets-Texas taco.  Not crazy spicy, but enough kick to satisfy the Texan in us. My new go-to taco recipe for sure.


Recipe

  • 2 lbs ground beef (I used 90% lean)
  • ½ large sweet onion, diced
  • 2-2.5 tablespoons chili powder (medium heat if you get a choice)
  • 2 teaspoons ground cumin
  • 2 tsp hot sauce
  • 2 tsp course kosher salt (can reduce to 1.5 teaspoons if you like it less salty)
  • 1 tsp oregano
  • 1 tsp paprika
  • ½ tsp black pepper
  • ¼ tsp onion powder
  • ½-3/4 cup water
  • ¼ cup taco sauce


Brown the meat with the onions in a large skillet. Once brown, mix in the chili powder, cumin, hot sauce, S&P, oregano, paprika, and onion powder. To create a little sauce, add between a half cup and ¾ cup water, and let simmer for a minute or two.  Stir in the taco sauce, cover, and simmer on low for about 10-15 minutes (add more or less water or taco sauce if your beef is extra lean or fatty). Serve on tortillas. Or on salad. Or in a quesadilla. Or on nachos. We did all four.

PS - I looooooove my tacos on Food for Life's brown rice tortillas. Wowzer. 


Thursday, March 6, 2014

An Incredible Steak

I was going to call this ‘the perfect steak,’ but then I realized I haven’t tried every single steak so I couldn’t possibly know if this one is perfect. But it is darn near close.  A friend of mine at work who likes to swing by and rattle off all of his delicious-sounding homegrown recipes (hi Mike B.), told me about this a while ago and I’ve had it on my mind ever since.  I even texted him on Sunday to get an emergency reminder of what to do.

So, let’s get to it. The key to this steak is the cooking technique.  This is how the steakhouses cook a steak, according to Mike, and I’ve never met a steak at a steakhouse that I didn’t like.  It also must be foolproof, because overcooking meat runs in my family.  

Now, the marinade is optional – but I really like the additional flavor it brought to the table. Mike adds tons of garlic, we didn't. Up to you. 


What you need:

  • 2 boneless Rib eyes (at least ¾ inch thick) 
  • Optional marinade (1/2 cup balsamic, 1/2 cup olive oil, 2 teaspoons Worcestershire)
  • Salt and Pepper
  • HOT grill pan or skillet 
  • Butter
  • Oven at 400 degrees

If marinating, do so at least 3 hours before or overnight.  When ready to cook,  remove from the fridge and let the steak come to room temperature (about 30 minutes before).  Sprinkle with lots of salt and fresh cracked pepper.  Heat a grill pan and a tablespoon or two of butter over the stove on high until it’s super hot.  Sear each steak for two minutes on each side, then place the skillet in the oven for 6-9 minutes.  6 will get you to medium-rare, 9 will get you to medium-ish (We did 8 and it was perrrrrrfect). Let sit for several minutes before serving.  And voila,  suddenly you're the steak hero of the family.  Thanks for sharing Mike!


Monday, February 3, 2014

Meatball Subs


First I would like to take a moment to admire this photo. Do you feel like it's far better than usual? Well, it is, courtesy of my sister Bente. She got me this app called Vibrantly that helps to improve your food photography. Whether it was a hint or just a thoughtful gift, I'm not sure. But I love it.
Do you like how I always post holiday/event food ideas after the holiday/event has already taken place? I’m sorry. These were perfect for the super bowl, and I should have told you to make them earlier. So now, I think you should make them for the Oscars (we should celebrate the fact that we're not the ones that have to squeeze into those dresses).

I’ve had meatball subs on my mind for a while now. We eat them at this dive-bar place in Dallas called the Loon, and also like them at Potbelly’s and Subway (and I’ve heard they’re great at Jersey Mike’s too).  But each meatball sub is a tad different, from the meatball size to the cheese to the bread. We have opinions about each one of those things, so I customized this into what I believe to be the perfect Meatball Sub: small meatballs (I have a small mouth), lots and lots of un-garlic-y marinara, soft but crusty buns, and mozzarella instead of provolone. Loved them.  And the best news: WE HAVE SO MANY MEATBALLS LEFT.  

Recipe (makes a lot – at least 8 subs)

·       1.25 lb ground beef

·       1.25 lb ground pork

·       Several dashes Worcestershire

·       1/3 cup breadcrumbs (we used gluten free)

·       2 eggs

·       ¼ cup shredded parmesan

·       2 tablespoons milk

·       ½ teaspoon salt, pepper to taste

·       1.5 24 oz jars of Marinara (36 oz total - I used a combination of a brand called Patsy’s and Newman’s Own)

·       1 14.5 oz can diced tomatoes, drained

·       Mozzarella cheese

·       Hoagie rolls

To make the meatballs, combine the beef, pork, Worcestershire, breadcrumbs, eggs, parmesan, milk, and S&P.  Mix well. Form 1.5-inch meatballs and place in a dish to refrigerate until you’re ready to cook (at least 20 minutes or so).  Preheat the oven to 400.  Heat a pinch of olive oil in a large skillet, and brown all sides of the meatballs (just a couple of minutes – meatballs should be browned not cooked) and using a slotted spoon (draining the fat), transfer them to a plate. Layer about half of the marinara on the bottom of a large casserole dish (13 inch), then place the browned meatballs into the dish, and top with the rest of the marinara.   
Bake for about 30-35 minutes, or until the meatballs are done. Lightly butter the rolls for the sandwich, then broil for a few minutes to toast. Top with marinara, meatballs, and lots of shredded mozzarella cheese. Serve warm!
 
Stayed tuned for my other super bowl recipes….

Queso Fundido
Black Pepper Roasted Cashews
And of course we made my favorite spinach dip, in my new cute little Le Creuset Au Gratin Dishes.
It was a perfect cheese-heavy super bowl with my favorite cheese heads!

Thursday, January 23, 2014

Meatloaf


This is another meatloaf recipe (I have one from long ago), and I'm really only adding it to this blog because I want to remember what I put in the sauce, because we really liked it (that and the fact that I have no time write another new post right now - sorry!).  The recipe is really quite standard - ground beef, eggs, bread crumbs - I sauteed some onions to put in it, then added a dash of Worcestershire and ketchup.  Then I topped it with this sweet yet tangy sauce, and roasted it with some veggies. 

We wanted to use lean beef so that we would eat it for leftovers on Monday (we used 93% lean), so it doesn't stay quite as firm as it would when you use the standard 80/20 ground beef. Your call, but the flavor was great and it only crumbled a little bit - so worth the health advantages in my opinion.

Recipe
  • 2 lb ground beef
  • 2 eggs
  • 1 cup bread crumbs
  • 1 teaspoon salt
  • pepper
  • 1 medium onion, finely diced and sauteed
  • 1/3 cup chicken broth
  • Several dashes Worcestershire
  • 2 T ketchup
  • 2 spoonfuls of the sauce below
Sauce
  • 1 cup ketchup
  • 1/3 cup brown sugar
  • 1 tablespoon dijon mustard
  • 1 tablespoon Worcestershire
Preheat the oven to 350.  Saute the onions, then add in the chicken broth, Worcestershire, and ketchup.  Cook until the chicken broth is mostly absorbed.  In a bowl, mix the beef, eggs, breadcrumbs, S&P, and onion mixture.  In a separate bowl, mix all the sauce ingredients.  Spoon about two tablespoons of the sauce into the meat mixture.  

Grease your baking dish, then transfer the meat to it and form into a loaf. Brush the sauce on top.  We chose to scatter some veggies drizzled with olive oil along the side to roast with it (must be cut into small pieces or they won't get done).  Bake the meatloaf for about 1 hr 10 minutes.  Wait a few minutes before slicing.

Monday, January 13, 2014

Slow Cooked Pork Chops and Gravy

I imagine this photo will never make the cover of Bon Appetit.  Or this recipe.  My husband has been harassing me to make it for a while now. He saw it when someone posted it on facebook, and he has no idea where the recipe came from, but he knew it had pork chops, cream of chicken soup, and Ranch seasoning. And a crock pot.  Sounds like a recipe straight out of the Midwest. 

I should say that I cringed when I first heard the ingredients (I think we're supposed to be getting away from cooking with canned 'cream of _____' things, and the ranch dressing, and the crock pot)...but I didn't. The truth is I love recipes like this (and you know what 'like that' means).  They are always good. ALWAYS. I will never turn my back on the midwest and casseroles and canned creamy soups and crock pots.  Although I do not have a crock pot. I use a covered pot in the oven instead. 

As I said, I can't site the source of this recipe, but I added extra soup for the gravy and some Worcestershire. So easy, and yes - delicious.

Recipe
  • 4 bone-in pork chops, at least 1-inch thick
  • 2 cans cream of chicken soup (I used healthy request!!)
  • 1 package Hidden Valley Ranch seasoning
  • Several dashed Worcestershire
  • Chicken broth
Preheat the oven to 300.  Place the pork chops in the pot of your choice (must have a cover). Mix the soup, ranch seasoning and Worcestershire in a bowl. Pour over the pork chops. Add a bit of chicken broth to cover the bottom of the pot and halfway up the first layer of pork chops (about 1/2 cup or so).  Cover, and place in the oven for about 2 1/2 hours. Pork should be very pork tender and the gravy should be nice and thick. SERVE THE GRAVY OVER POTATOES.  I had to tell my husband 5 times to try the gravy on his potato (rather than the cheese and sour cream he had), until I finally had to resort to expletives and a raised voice.  So good. 

You could also make this in a crock pot, I would imagine on low for 5-6 hours.

Tuesday, November 26, 2013

Slow Roasted Pork with Creamy Apple Gravy

Colder weather has finally hit Dallas! I missed the start of it because I was hanging out in 90-degree Singapore (sorry for the lack of posting), but I stepped off the plane this weekend into a crisp 40 degrees and it felt great.  For my WI/IL/MN friends, November is the start of a long and bone chilling miserable winter (at least that's how I remember it). In Texas, it’s really the start of a delicious cooking season. The cold weather is so fleeting that you really get to enjoy its comforts in all their glory.  And you really have to jump right into it because grilling season comes back before you know it.  Slow roasted meats, stews, gravy, casseroles….I love it all.


So this past weekend I was craving a pork shoulder. And it occurred to me that I had only eaten a slow roasted pork shoulder in the form of a pulled pork taco. Why?? I don't know! I love the flavor of the meat and the way it falls apart in the oven.  I decided to cook it just a tad less so that it wasn't totally dissolved into a pulled pork, and I braised it in an apple juice based broth, then added a touch of cream.  Ohhhhh, it made the house smell so good and the taste was even better - the pork is so tender and literally melts in your mouth. Putting this on the favorites list.

Recipe
  • 5 lbs boneless pork shoulder, cut in half
  • Salt, pepper, brown sugar, and flour for seasoning
  • 3 cups apple juice
  • 2-3 cups beef broth
  • 1/2 teaspoon salt (more if using low sodium beef broth)
  • 1 tablespoon Worcestershire
  • 1 bay leaf
  • Several sprigs fresh thyme
  • 3 cups carrots, cut into 3 inch pieces
  • 2 small onions, sliced
  • 1/2 lb mushroom caps
  • 3 tablespoons flour, whisked together with 1/4 cup water
  • 1/4 cup half & half
Preheat the oven to 300 degrees. Pat the pork dry, then season with plenty of salt, pepper, and brown sugar (probably about 2-3 tablespoons brown sugar).  Coat with flour (about 1/4 cup).  Heat a tablespoon or two of olive oil in a large pot over medium-high heat. Brown the pork shoulder on all sides, then reduce the heat to low.  Add the apple juice, beef broth (enough to cover about 3/4 of the meat), Worcestershire, bay leaf and thyme.  Add in one carrot and 1 onion to help flavor the broth (you'll add the rest later so they don't get overcooked).  Bring the sauce to a simmer, then cover tightly and place the pot in the oven.  After two hours, add in the remaining carrots, onions, mushrooms, and more apple juice if necessary. Cook for about one hour more (three to three and a half hours).  Remove the pot from the oven, and increase the heat to 400.  Using a slotted spoon, transfer the meat and vegetables to a rimmed baking sheet lined with foil. Carve the meat into large delicious looking chunks (6-8 pieces).  Drizzle with enough sauce to cover the bottom of the baking sheet.  Place the meat/veggies the oven, and cook for about 10 minutes to brown the meat (no longer or you will begin to dry out the meat).  Meanwhile, place the remaining sauce over high heat on the stove.  Skim off any excess fat, and remove the bay leaf and thyme.  Whisk together the flour and water, then stir into the sauce and allow to thicken.  Reduce the heat to low, and mix in the half and half. Serve the meat and veggies over mashed potatoes and drizzle with LOTS OF SAUCE.  Loved loved loved this.


Tuesday, November 12, 2013

Homemade McRib

Yep, that's right. A homemade McRib. After being harassed by McDonald's for weeks now about the return of the McRib, we finally had to cave in and make it.  Have you not felt that same temptation? Well, move to Texas. Everything with barbecue sauce will start to make your mouth water. And quite frankly, it intrigues me. What the $%$#^%$^% is a McRib made out of?

The answer is: who knows (or according to this website, 70 different ingredients). Sort of gross.  But if you make your own, you know exactly what's in there.  I found and followed this recipe, and it tastes just like it.

I went to Central Market and got boneless country style pork ribs instead - about a pound and a half. I think you could probably just ask the meat man to remove the ribs on a regular rack, but they might ask you to never come back.  Then you simply puree the meat in a food processor with a bit of sugar, water and salt (sorry to use the words 'puree' and 'meat' in the same sentence), form them into patties to fit your buns (long but fatter than hot dog - Cobblestone hoagie rolls were perrrrfect), use your fingers to create little ridges for ribs (this was my own sneaky little personalized step for authenticity), freeze them for a while to get them to hold shape, then grill and slather with barbecue sauce! Easy.  We used Rufus Teague's Honey Sweet BBQ sauce, but use whatever your fave is.  For the record, I can't figure out what my favorite is. At any given time we have 4-5 bottles of barbecue sauce in our fridge. Since moving to Texas, I can't get enough. Put it on my sandwich, put it on my tortilla, put it on my nachos, put it on my pizza. Sweet, tangy, hot, mild. Love it.  Love it all. 

Anyway, if you want to impress the man in your life, make these. If only just to offer something year round that McDonald's can only offer annually.

Friday, November 8, 2013

Hot Beef Quesadillas

Last weekend, I felt like I found a $100 bill in an old purse. I was trying to fit my leftover fro yo in the freezer (yes, sometimes it's that big), and as I was rearranging I found a big container of leftover hot beef.  Jackpot. And instead of making the sandwiches that we know and love, we decided to try quesadillas.  Tortillas, Mexican blend shredded cheese, and hot beef (drained a little to remove the excess juice), cooked on a hot skillet...it was SO GOOD.  Best use of leftovers ever.  In fact next time I make hot beef I might just make the quesadillas. Serve with sour cream!

PS. Hot beef freezes amazingly well - it tasted just as good. My recipe makes a lot so it's perfect for freezing for a rainy (or busy) day.

Monday, October 21, 2013

Chili


I miss the days when chili was just chili. There was one version. Mom was making chili for dinner, and you knew exactly what you were getting.  Now, there are 1,456,999 chili recipes and they all claim to be the best. You need to add hot sauce, make it with turkey, add some beer, use maple syrup, include a pinch of sugar, and the list goes on. Googling chili recipes is about as overwhelming as pinterest. What the $%#@ am I supposed to make?

So I decided to make a basic ground beef chili, and I just added ingredients that I thought would taste good. I added a beer because I like how beer/wine smells when it's cooking, I added a teaspoon of cocoa powder because I like chocolate, I added the corn flour because I like thicker soups, and I added corn because John made me. You will also notice the absence of beans. We don't like them.  And other than that the recipe is pretty standard. We both scraped our bowls clean and went back for seconds, so I think it's pretty good. I won't tell you it's THE BEST, because I don't want to send you on the emotional roller coaster that I went through choosing this ingredient combo. But, we really liked it and will probably continue making it this way just so I never have to google the word 'chili' again.

Recipe
  • 2 lb lean ground beef
  • 1 onion, chopped
  • 1 can beer
  • 1 can tomato sauce
  • 3 cans diced tomatoes, with their juices
  • 1/4 cup corn flour + 2-3 tablespoons water
  • 1 can corn, drained
  • 3 tablespoons chili powder (can use up to 4 tablespoons)
  • 1 teaspoon ground cumin
  • 1/2 teaspoon ground oregano
  • 1/2 teaspoon cayenne pepper (or more if you like spice)
  • 1/4 teaspoon paprika (optional)
  • 1 teaspoon Worcestershire
  • 1 teaspoon unsweetened cocoa powder
  • 1 teaspoon salt (more to taste)
  • 1/2 teaspoon pepper
In a large pot, brown the beef.  Add in the chopped onion and continue to cook for a few more minutes.  Pour in the beer, and simmer for about 10 minutes or so, then add the tomato sauces. In a separate bowl, whisk together the corn flour and water; stir it into the chili to let it thicken. Add in the corn and all remaining ingredients.  Let simmer for at least 30 minutes to allow flavors to blend. Serve with cheddar cheese, tortilla chips, and sour cream.  We ate this with John's famous Buffalo Chicken Sandwiches.